Do It Yourself Switches and Buttons for e-textiles #passthescopeEDU #ecg2016 #edcampvoxer

For those who don’t know about e-textiles, start with this little explanation:


If you missed the post about series circuitry, check out:

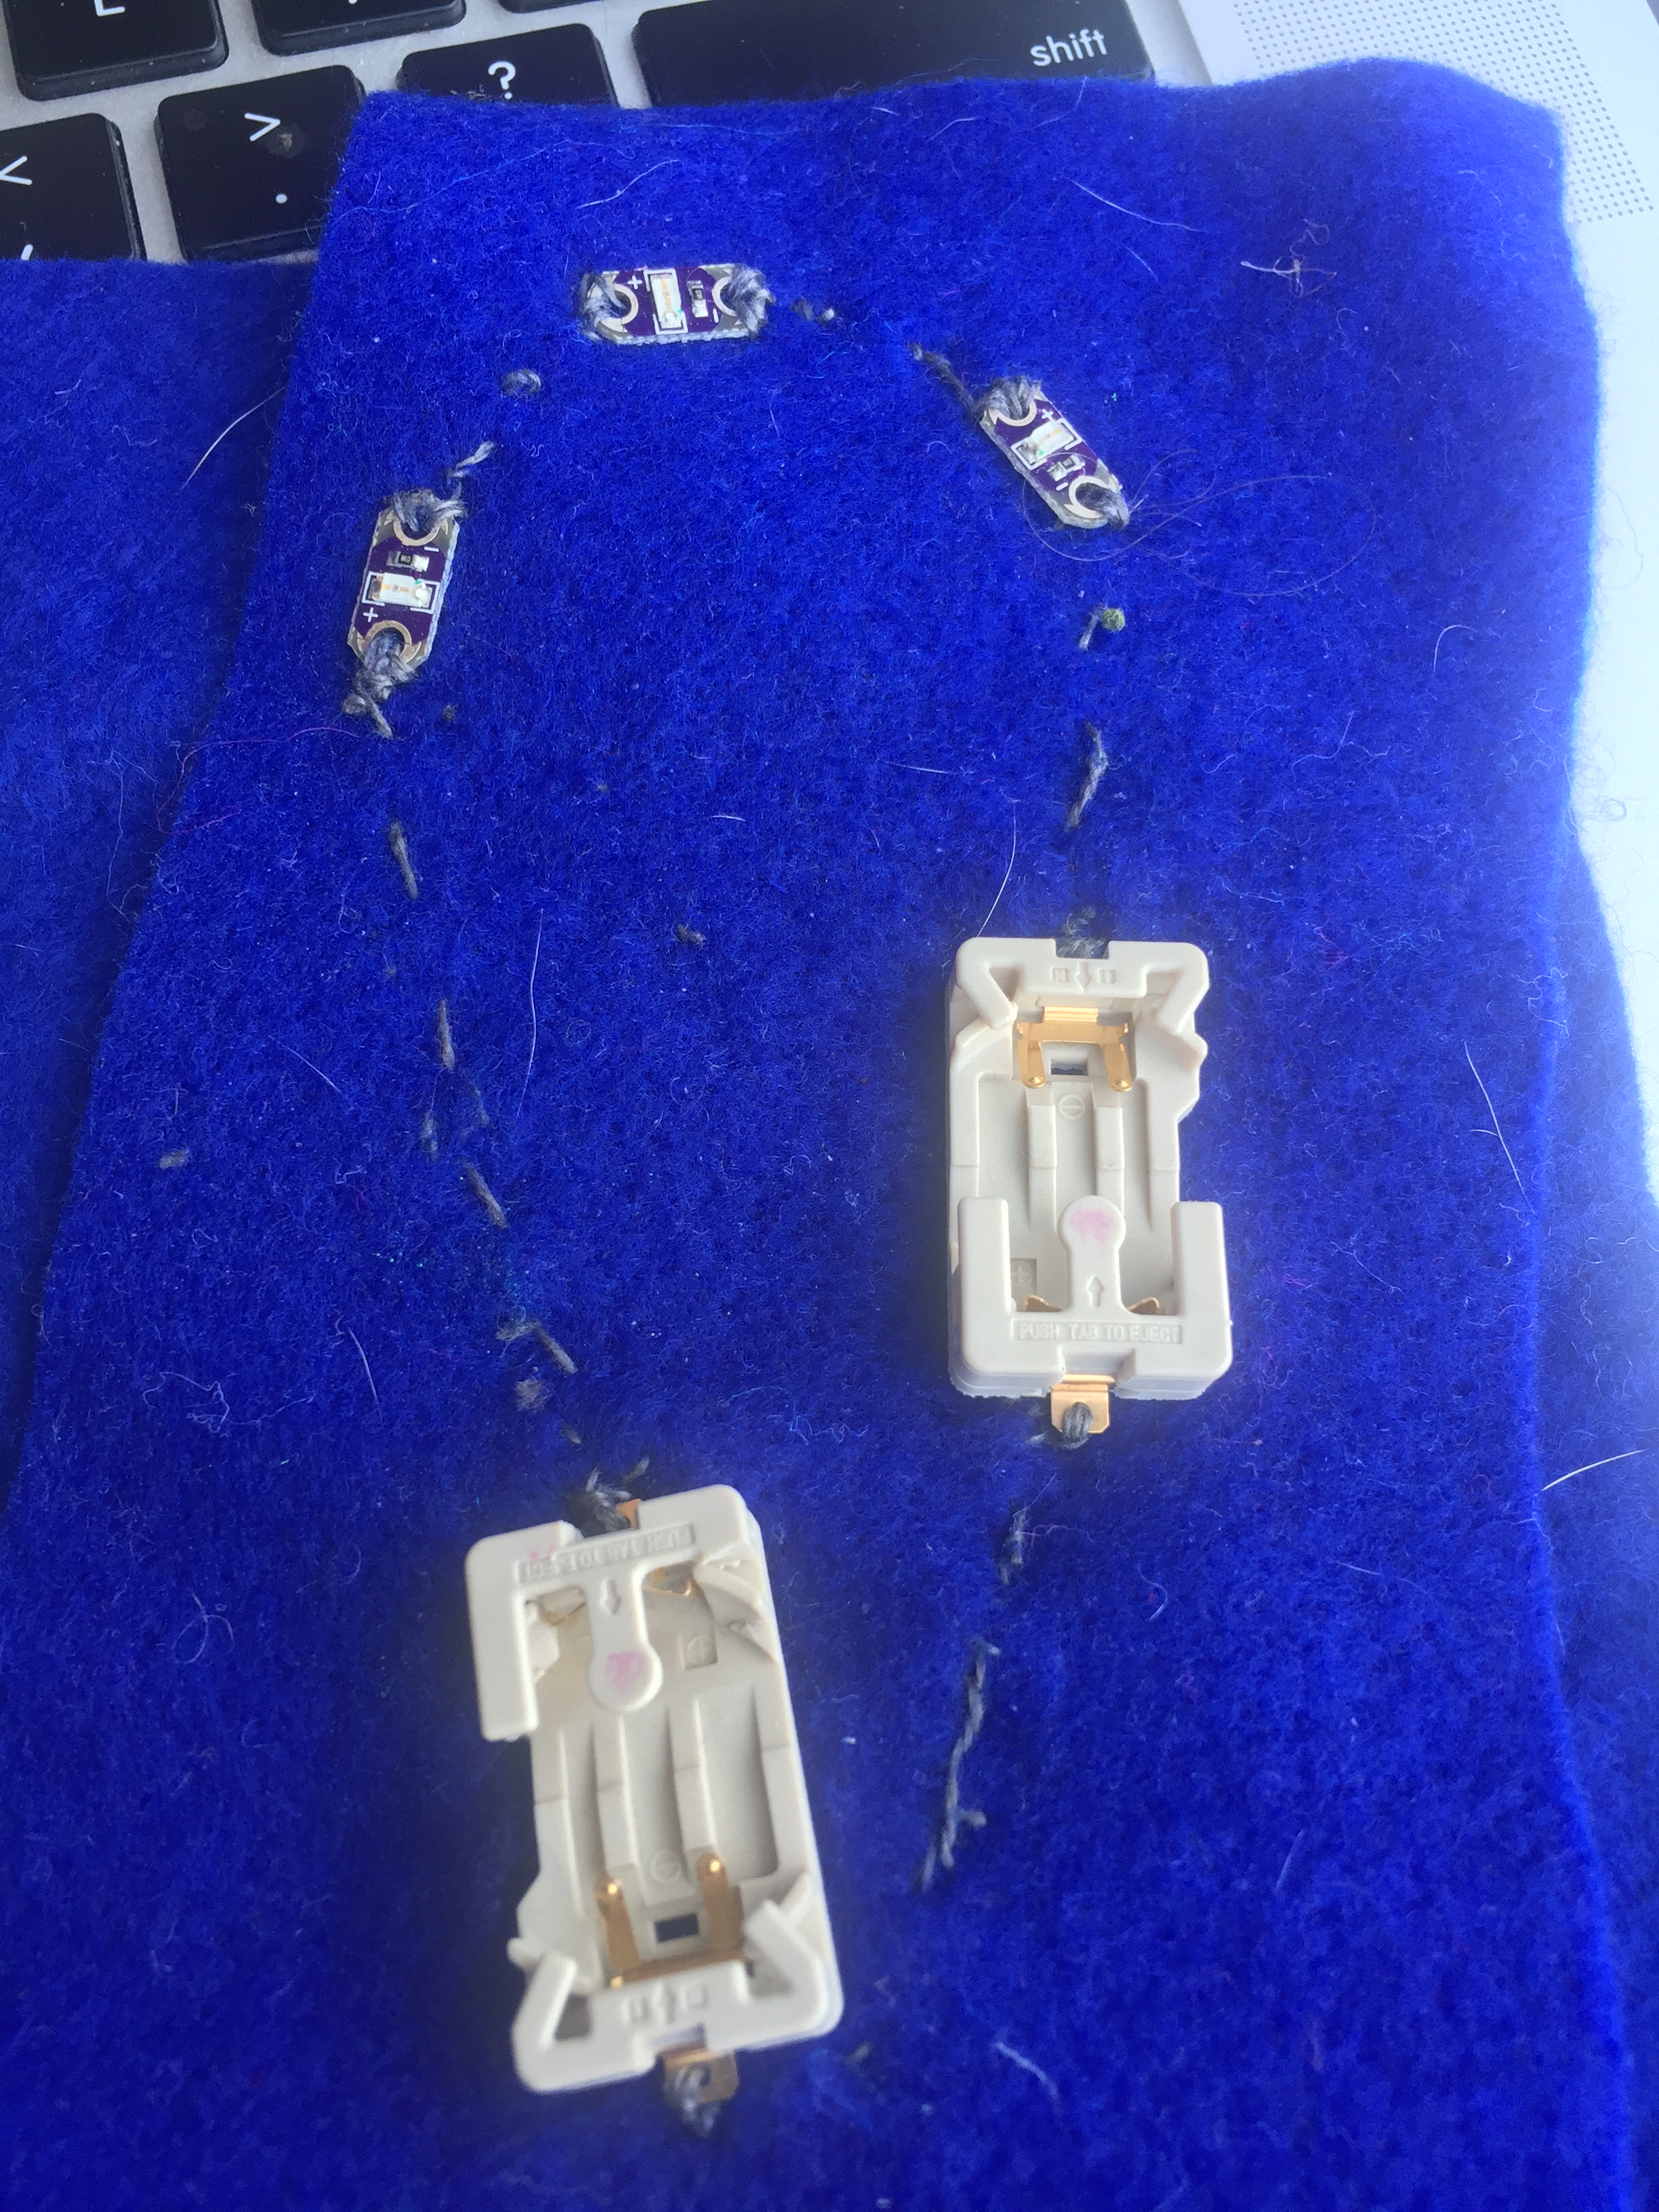
Those tiny white hairs on the blue felt belong to Nina, in case you’re wondering:

IMG_0226

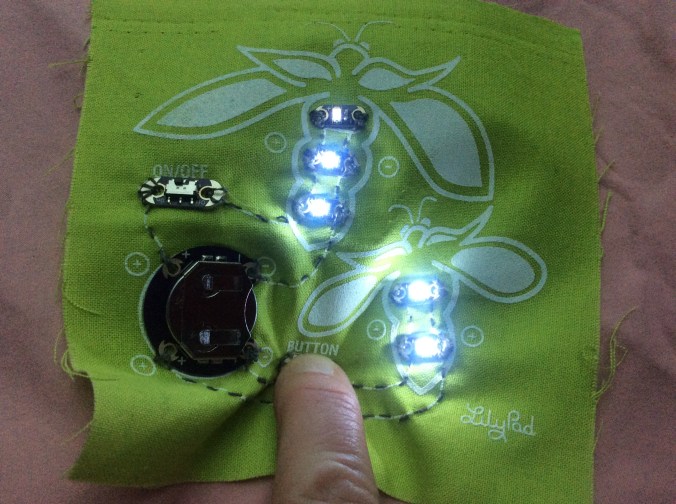
Today’s post continues the use of the LilyPad Design Kit from Sparkfun Electronics.  The difference here is that the switches and buttons are improvised, as you’ll see.  Hence the title, DIY or do-it-yourself.

DIY Button:

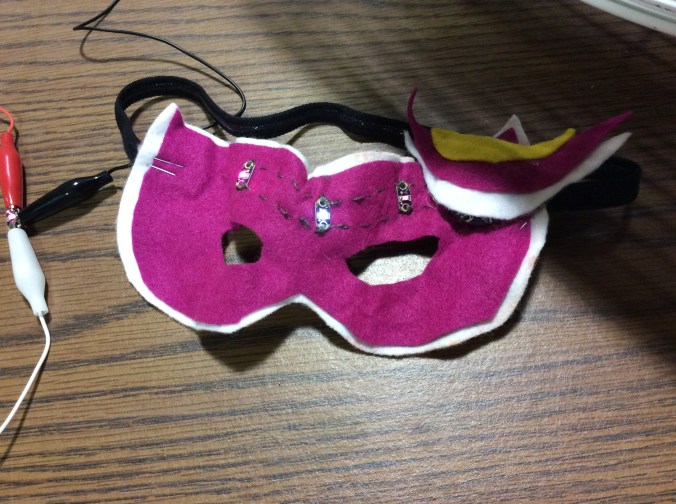
The idea here is that, sure, you can purchase a button.  In fact, LilyPad Design Kit comes with a few.  So do the protosnap sets that I’ll post about down the line.  But you don’t have to use the manufactured buttons.  If you chose to do-it-yourself, you might even learn something.  Like, how a button works. Not a button that goes up your shirt; a button that completes an electronic circuit.  Here is what a big, felt DIY button looks like when it’s done:

DIIY button.JPG

My process was thus:

I did not try to figure it out before I started.  I just started following the directions for gathering the materials.  I love having materials in my hand.  It’s reassuring somehow.  I look at the pictures and see if I can imagine what is going on.

Now, sometimes this gets me no where fast.  Most of the time, though, it gets me intrigued.  It’s a challenge, to overuse a popular buzzword.  I’m not challenged to prove to anyone, least of all to myself, that I can solve the puzzle. What I’m talking about is more of an entertainment. Play with a purpose. An example might be playing solitaire with a deck of cards, or, perhaps, mountain biking by yourself. No one is seeing you, judging you, keeping score, or praising you. The challenge absorbs you until you are either tired or bored.  While it lasts, you just ride it out for the sheer interest of it.

Imoverit

Okay, no more small talk.

Keep in mind that the shiny metallic-looking fabric inside the button is capacitive, just like the thread. Watch the video:


Here you see the inner workings of a button.  No one actually uses a button such as this. It’s for play. In other words, it’s impovisational in a make-believe way.  Did you ever play house when you were little?  Did you ever have an easy-bake oven? Making a button like this is simply a way to play electrician without getting electrocuted or starting a fire.  You can wash it, by the way, but take the battery out first.

good vibes


On to the completion of doing-it-myself:


Time for a Pop Quiz (a thing that never happens in the world of making, by the way):

Why is it not such a good idea to use conductive thread to sew around the edges of the button?

That’s right: Because it isn’t necessary since it doesn’t need to carry a charge and may end up short circuiting the thread that does need to carry a charge.

well played

Think about tasks that challenge you without the accompanying sense of competition or seeking of approval.

What is it about a task that gives you a sense of accomplishment without anyone noticing whether you succeeded or not?

What does that tell you about yourself?

Next post: DIY Switch

Keep in touch!

smh.png


From Parallel Circuits to Series Circuits Using LilyPad Electronics #passthescopeEDU #ecg2016

Here’s a link to the post introducing this series about e-textiles.

And here’s a link to the post where I last left off:


And now, without further ado, we come to the latest installment.

There’s really no reason why series circuits should be any more difficult, but, for me, they were.  And having difficulty is actually an opportunity for problem solving and therefore learning. I’m documenting my process so that others can see that the path to understanding is not always direct.  There was no one guiding me but an online tutorial.  I had to figure out why the connections were not correct and redo them.  Each attempt required testing.  This is an iterative process.


As I’m explaining what I’ve done, I’m actively explaining my thought processes and inquiring into how I went astray. I interrupt myself, going on a tangent.  I explain various things I checked for and how I decided to put on my glasses and look at the directions. Live and learn.

This iteration doesn’t work either. Perseverence.  I make some conjectures about my errors.

I had decided to literally do it over. I set aside my first attempt and used completely new parts on a new felt. “Back to the sewing board,” as it were.

Here I decide to do a little experiement midway through the task.  Instead waiting till the end to test it, I use a needle to test of the connections are good.  I think ahead to my next move.

Here I decide that I should try different batteries.  This was about the time I got the idea to use the simple circuit as my battery tester.


This is where I dig in and do some serious debugging.  I’m attempting to isolate the problem area by finding all the connections that successfully light up LEDs.  Notice that I state that it isn’t working “YET.” That’s growth mindset at work.

i'm on it


Here I’m becoming more practiced at troubleshooting.  You can hear my dog shaking in the background.

IMG_2548.JPG

She gets bored when I’m busy.


Here I’m able to conclude that my error was in having too many LED for the number of batteries.  I had misread the directions.  Eventually, I will not need directions.  This is a step along the way toward that end.

struggle is real

I decide to put it on the back burner and move on to the next project.

This clip cuts off mid-sentence.  I’m trying to explain here that sometimes you have a problem and that problems are not completely unavoidable.

Think of times when you have encountered technical difficulties.  How did you get through it.  What was your mindset?

working late.png


From Simple Circuit to Parallel Circuit #PassthescopeEDU

My first post on this topic: “E-texiles?”

IMG_3282

Most recent previous post: “Simple Circuit”

This series of post documents my own process as I learn to use electronics.  Beginning with non-programmable circuitry sewn into fabric, moving then into microcontrollers, and eventually into Arduino programming.

Today’s post branches into parallel circuits.  Looks like this:


The tricky part that I had to learn is to wear my glasses and triple check which was positive end of LED mini-board and which was negative.  Another thing to look out for is the conductive thread hanging out on the bottom side of fabric.  The knots have to be trimmed down to prevent short circuits.  Finally, must check that needle pulls thread all the way through.  Not an easy matter to go back and undo if you realize you left some slack.


Three upcoming virtual events:

First:  #EdCampVoxer takes place July 5-9, 2016.  There are tons of Voxer chats available to participate in. I will facilitate “Making as Learning” and “Green Screen Video Production”.

Second:   #passthescopeEDU which takes places on July 21st with my session happening at 1pm. I will Periscope at the end of a week facilitating ArtDuino camp with a group of young campers in Vermont.

Third: There’s another virtual event coming up with will feature some use of e-textiles. EdCampGlobal, #ecg2016, takes place July 30th all day.  The session I’m facilitating will take place via periscope at 2pm while I’m at the Rutland Mini-Maker Faire in Vermont.  It will be my second year with an interactive booth.  We make mostly non-programmable robots, but I’m expanding the offerings to include e-textiles.

If you are interested in knowing more, please let me know.  You can tweet me @msdayvt or @CynthiaEDay.

What are you summer plans?

Using LilyPad Design Kit to learn basics #passthescopeEDU”

Clear here for earlier post about “what are e-textiles?”

My most recent post demonstrated the use of an “e-sewing kit” from Sparkfun Electronics.  

This post demonstrates use of a “design kit”.

The design kit is meant to be more flexible and creative.  There are more components that can be combined in more ways.  The basic electronic foundations are no different than the e-sewing kit.

Today I found a wonderful explanation of electrical circuitry.  My words in this post are not for the purpose of proving my facility with teaching electricity and magnetism concepts, but rather to document my learning path with e-textiles.  If you, as a blog reader, are looking for student-friendly explanations, I can point you to teachergeek.com and their “bug lab.”


The battery holder used here is not from LilyPad.  I bought a ton of them at much lower cost.  The drawback is that you can’t use a fat needle because there isn’t room.  That makes threading the needle more difficult.  You can use a little device to help thread the needle if you must.


Making a simple circuit is simple, but not a waste.  I now use this to test batteries.  It’s with me all the time.

July 21, 2016, is our next #passthescopeEDU.  My plan at this point is to show some of these little projects discuss upcoming projects.  It will be a 5-10 minute periscope beginning at 1:00 pm.  Follow the hashtag and learn from all of us.  My Twitter handle is @msdayvt.  See you soon!

July 4

e-textiles using LilyPad electronics

For an introduction to what e-textiles are about, look at previous post here.

Here is a very introductory sewing tutorial (11:04):


What follows is an easy to follow documentation  that can be used as a tutorial with use of the e-sewing kit, with links to products, photos, and videos.

Today, the topic is using a kit.  There are guides at Sparkfun: Part One and Part Two.

Here are a few short clips from my process:

First, I show getting started (2:28):


Next (1:11):


And (0:37):


Further (0:37):

Continuing (1:05):


More (1:04):


And (0:38):


At this point: You have a complete project. You can use the project for multiple purposes.

It can be sewed or glued to almost anything and it can be sewed onto nearly anything.

esewing kit.JPG